Yard & Landscaping
Choosing and Installing Edging Between Lawn and Beds
A practical guide to lawn edging ideas: types of garden edging, metal vs plastic, and how to install landscape edging so beds stay tidy all season.
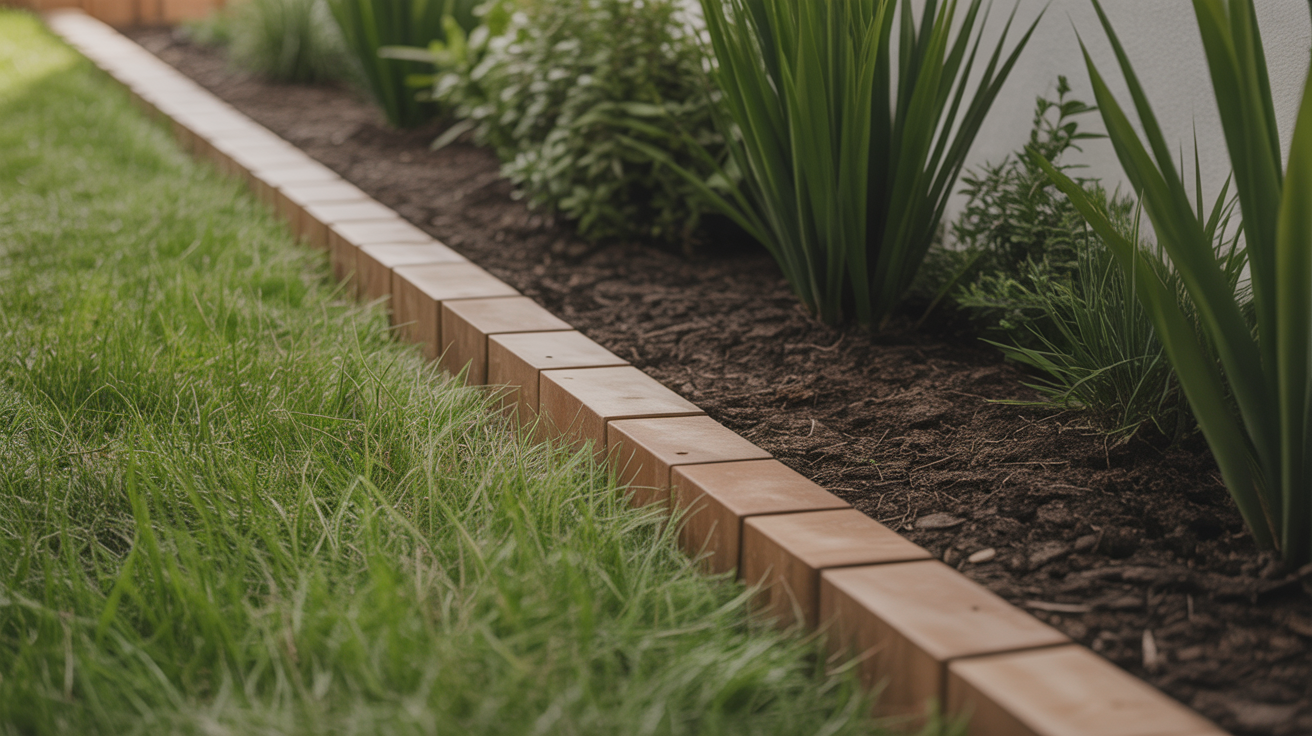
A clean line between the lawn and a garden bed does more than look sharp. It keeps grass runners from creeping into mulch, slows weeds from migrating outward, and gives you a defined guide so mowing and trimming the border takes less time. Good edging also holds mulch in place better than an open soil edge.
That said, edging is not a one-time install. Frost heave can pop lightweight materials loose by spring, grass still needs annual re-cutting at the boundary, and the wrong material in a curved bed creates frustration fast. Knowing what each type actually does in the ground makes the choice straightforward.
Types of Garden Edging
Before buying anything, it helps to understand how the common options behave once they're in the soil, not just how they look in a display.
Plastic Edging
The most common material at home centers. It comes in rolls or rigid sections, drives stakes to anchor it, and curves easily around sweeping beds. Cost is low, typically a few cents per linear foot.
The downside is durability. Standard black plastic becomes brittle after several seasons of UV exposure, and the top lip can roll or lift in areas with significant freeze-thaw cycles. In colder climates, frost heave pushes it up during winter, leaving gaps that grass exploits by spring.
Best for: budget installs, temporary borders, or gently curved beds where long-term appearance is less of a priority.
Metal Edging (Steel and Aluminum)
Steel edging has become much easier to find and is the default for a lot of experienced DIYers. It sits flush with or just above soil level, keeps a very clean visual line, and lasts for decades when properly installed. Cor-Ten (weathering steel) develops a rust patina over time; powder-coated steel and aluminum stay silver or black.
Aluminum is lighter and easier to bend for tight curves. Steel is stiffer and holds long straight runs without wavering, but the top edge is sharp during installation, so heavy gloves are not optional.
Cost runs higher than plastic, but a single install can outlast five rounds of plastic replacement, which usually works out cheaper over ten years.
Best for: permanent beds, long straight runs, or wherever you want the edging to disappear visually at grade.
Concrete and Brick Edging
Poured concrete curbing and mortared brick edges are permanent installations that handle frost heave better than thin strips because they have mass. Any settled or cracked section, though, requires significant effort to repair.
These are more of a hardscaping decision than a lawn-care one, and they generally need more preparation, more materials, and occasionally professional installation. If you're looking for weekend lawn edging ideas, a structural masonry edge is likely more than the project calls for.
Natural (Trenched) Edge
The simplest option requires no purchased materials. A sharp flat spade or half-moon edger cuts a vertical face 3 to 4 inches deep along the bed boundary, creating a shallow trench that slows grass migration by removing the soil bridge. You re-cut it once a year in spring.
It looks clean in a cottage or informal garden, follows curves naturally, and costs nothing but time. The trench also gives you a consistent line to follow when maintaining the border through the season.
The catch: grass still crosses eventually, and mulch can spill into the trench. In wet seasons the edge blurs faster than in dry ones.
Metal vs. Plastic Edging: A Side-by-Side Look
Here is a direct comparison of the two most common choices for residential installs:
| Feature | Metal (Steel or Aluminum) | Plastic |
|---|---|---|
| Typical lifespan | 15 to 25+ years | 3 to 7 years |
| Frost/heave resistance | Good with adequate stake depth | Poor to moderate |
| Curves | Aluminum bends well; steel resists | Very flexible |
| Visual profile | Low, nearly invisible at grade | Visible top lip |
| DIY difficulty | Moderate (heavy, sharp edges) | Easy |
| Cost per linear foot | Higher upfront | Lower upfront |
| Best run type | Long straight or gentle curve | Any curve, short runs |
If you're installing edging across a large property or want something you won't revisit for a decade, metal usually wins on total cost once you factor in replacement cycles. If you're doing a small border or want to test a bed layout before committing, plastic is a practical starting point.
How to Install Landscape Edging
The installation steps are similar across most edging types. The main variables are how deep you go and how you anchor it.
What You'll Need
- Edging material (measure the run and buy 10 to 15 percent extra)
- Flat spade or edging spade
- Rubber mallet
- Anchor stakes (if not included with the edging)
- Garden gloves (heavy leather for metal)
- String line and stakes, or a garden hose, for layout
- Knee pad
Step-by-Step
1. Mark the line. Use a garden hose to define curved edges or string and stakes for straight runs. Walk back and look at it from a distance before cutting anything.
2. Cut the edge first. Even if you're installing hard edging, cut a clean vertical line with a spade along your marked boundary. This removes the sod root mass at the margin and makes seating the edging much easier.
3. Dig a narrow trench. Most roll and strip edging needs 4 to 6 inches of depth. Metal edging manufacturers typically specify 4 inches buried with 1 to 2 inches above grade. More buried depth means better frost resistance.
4. Set the edging and check height. The top of the edging should sit roughly at soil grade on the lawn side, just slightly above mulch level on the bed side. This lets a mower wheel ride along without scalping turf and keeps mulch from washing under the edge.
5. Drive stakes. Space stakes per the manufacturer's recommendation, typically every 3 to 4 feet. For metal edging, stakes driven at a slight inward angle toward the bed hold better through freeze-thaw cycles.
6. Backfill and firm. Push soil back against both sides of the edging and tamp it down firmly with your foot. Loose soil around the base is the main reason edging heaves or leans to one side over the first winter.
7. Mulch the bed. Add mulch to the bed side after the edging is in place, not before. This gives you a cleaner finish and the right mulch depth right up to the barrier.
A Note on Frost Heave
If you're in a climate with hard winters, install edging deeper than the minimum recommendation. The freeze-thaw cycle works like a slow jack under shallow stakes, pushing them up an inch or two over winter. By spring you'll find sections leaning outward or gaps where grass has already crossed.
Re-tapping stakes in fall and adding backfill soil before the ground freezes can help, but depth is the better long-term fix. In areas with repeated deep freezes, metal edging with stakes driven to 6 inches tends to stay put far better than plastic at 3 to 4 inches.
Matching Edging to the Rest of the Yard
Edging does not exist in isolation. The material and style should fit the overall yard rather than contrast with it.
Cottage-style yards with informal planting often look best with natural trenched edges or low-profile metal. Formal yards with geometric beds suit clean steel or brick. Woodland borders leading into shadier areas sometimes need no hard edging at all; shade-tolerant ground covers handle the transition naturally and are lower maintenance over time. If you have a low spot or shaded strip where grass never establishes well anyway, ground covers for those difficult areas are worth considering before you edge anything at all.
Think about maintenance cadence too. A natural edge needs re-cutting once a year in spring. Metal needs only occasional stake checks. Plastic may need partial replacement every few years, which means sourcing compatible materials down the road. That is easier when you buy from a company that has carried the same profile for years.
Frequently Asked Questions
How deep should lawn edging be installed?
For most strip and roll edging, 4 to 6 inches of buried depth is the working range. Deeper installs resist frost heave better. If you're in a climate with ground frost, aim for the higher end of that range and stake firmly at the base of the trench.
Can I install metal edging on a curved bed?
Aluminum curves without much effort using hand pressure along the roll. Steel handles gentle curves reasonably well but is not suited to tight radii without kinking. For beds with very sharp curves, aluminum or flexible plastic is a better fit. Natural trenched edges also follow any curve without restriction.
Do I need to remove old edging before installing new edging?
Yes. Layering new material over old creates an uneven base that shifts unpredictably. Pull the old edging out, fill any voids left by old stakes, and set the new edging into a clean trench at the correct depth.
How often does landscape edging need to be replaced or reset?
Metal edging installed properly can last 20 or more years with only occasional stake adjustments. Plastic edging typically needs replacement or significant repair every 5 to 7 years, sometimes sooner in climates with hard freeze-thaw cycles. The bed boundary itself benefits from a fresh spade cut each spring regardless of edging type, to clear any grass that managed to cross over winter.
What is the difference between edging the lawn and installing landscape edging?
The terms overlap but describe different tasks. Installing landscape edging means placing a physical barrier in the ground. Using an edging tool at the border means trimming the grass line to keep the visible boundary clean. You can do one without the other, but they work best together: the barrier reduces how often you need to re-cut, and regular re-cutting keeps the barrier from getting buried or overwhelmed by grass.